Add an Existing Pallet to the Runtime
IntermediateIntroduction
The Polkadot SDK Parachain Template provides a functional runtime that includes default FRAME development modules (pallets) to help you get started building a custom parachain. However, you'll often need to extend your runtime by adding additional pallets to enable new functionality.
Each pallet has specific configuration requirements, including the necessary parameters and types that enable its functionality. This guide walks you through the complete process of adding an existing pallet to your runtime and configuring it properly using pallet-utility as a practical example.
The Utility pallet offers batch transaction capabilities, enabling multiple calls to be dispatched together, as well as origin manipulation functionality for advanced use cases.
In this guide, you'll learn how to:
- Update runtime dependencies to integrate a new pallet
- Configure pallet-specific Rust traits to enable the pallet's functionality
- Run your parachain locally to test the new pallet
Check Prerequisites
Before you begin, ensure you have:
Add an Existing Polkadot SDK Pallet to Your Runtime
Adding a pallet to your parachain runtime involves configuring dependencies, implementing the pallet's configuration trait, and registering the pallet in the runtime construct.
Add an Existing Pallet as a Dependency
The Polkadot SDK utilizes a monorepo structure, where multiple pallets are available as features of the polkadot-sdk dependency. A list of pallets can be found in the substrate/frame directory of the Polkadot SDK repository.
For pallet-utility, you need to add it as a dependency in the features array:
- Open the
runtime/Cargo.tomlfile. - Locate the
[dependencies]section. - Find the
polkadot-sdkdependency. -
Add
pallet-utilityto the features array:
Note
If you're adding a custom pallet that isn't part of the Polkadot SDK, you would add it as a separate dependency:
Ensure it's included in the workspace members section of the root Cargo.toml file.
Enable Standard Library Features
The Polkadot SDK runtime compiles to both a native binary (for running unit tests), which includes standard Rust library functions, and a WebAssembly (Wasm) binary (a more compact size for production use), which does not include the standard library. Since pallet-utility is part of the polkadot-sdk dependency, its std feature is already included when you enable polkadot-sdk/std.
To verify that the standard library features are enabled:
- In the
runtime/Cargo.tomlfile, locate the[features]section. -
Ensure
polkadot-sdk/stdis included in thestdarray:
Note
If you're adding a custom pallet, you must explicitly add its std feature:
Review the Config Trait
Every pallet defines a Rust trait called Config that specifies the types and parameters needed for the pallet to function within a runtime. Before implementing the configuration, you should understand what the pallet requires.
The pallet-utility Config trait requires the following types:
pub trait Config: frame_system::Config {
    /// The overarching event type
    type RuntimeEvent: From<Event<Self>> + IsType<<Self as frame_system::Config>::RuntimeEvent>;

    /// The overarching call type
    type RuntimeCall: Parameter
        + Dispatchable<RuntimeOrigin = Self::RuntimeOrigin>
        + GetDispatchInfo
        + From<frame_system::Call<Self>>;

    /// The caller origin, overarching type of all pallets origins
    type PalletsOrigin: Parameter + Into<<Self as frame_system::Config>::RuntimeOrigin>;

    /// Weight information for extrinsics in this pallet
    type WeightInfo: WeightInfo;
}
This configuration requires:
RuntimeEvent: Links the pallet's events to the runtime's event system.RuntimeCall: Allows the utility pallet to dispatch calls from other pallets, which is needed for batch operations.PalletsOrigin: Enables origin manipulation for dispatching calls as other pallets.WeightInfo: Provides weight calculations for pallet operations.
Tip
You can view a pallet's Config trait requirements in the Polkadot SDK Rust docs. Search for the pallet's name and check the type defined by its Config trait.
Implement the Config Trait
Now you'll implement the pallet's Config trait in your runtime to provide the concrete types the pallet needs.
To implement the Config trait:
- Open the
runtime/src/configs/mod.rsfile. -
Add the following implementation at the end of the file:
Add to Runtime Construct
The final step is to register the pallet in the runtime construct using the #[frame_support::runtime] macro. This macro generates the necessary boilerplate code for including pallets in the runtime.
To add the pallet to the runtime construct:
- Open the
runtime/src/lib.rsfile. - Locate the
#[frame_support::runtime]section (usually near the end of the file). -
Add your pallet with a unique
pallet_index:runtime/src/lib.rs#[frame_support::runtime] mod runtime { #[runtime::runtime] #[runtime::derive( RuntimeCall, RuntimeEvent, RuntimeError, RuntimeOrigin, RuntimeTask, RuntimeFreezeReason, RuntimeHoldReason, RuntimeSlashReason, RuntimeLockId, RuntimeViewFunction )] pub struct Runtime; #[runtime::pallet_index(0)] pub type System = frame_system; #[runtime::pallet_index(1)] pub type ParachainSystem = cumulus_pallet_parachain_system; #[runtime::pallet_index(2)] pub type Timestamp = pallet_timestamp; // ... other pallets #[runtime::pallet_index(50)] pub type Utility = pallet_utility; }
When adding the pallet:
- Assign a unique
pallet_indexthat doesn't conflict with existing pallets. The index determines the pallet's position in the runtime. - Use a descriptive name for the pallet instance, such as
Utilityforpallet_utility.
Warning
Each pallet must have a unique index. Duplicate indices will cause compilation errors.
Verify the Runtime Compiles
After adding and configuring your pallet in the runtime, verify that everything is set up correctly by compiling the runtime.
To compile the runtime:
- Navigate to the root directory of your project.
-
Run the following command:
-
Ensure the build completes successfully without errors.
This command validates the pallet configurations and prepares the build for testing or deployment.
Run Your Chain Locally
Now that you've added the pallet to your runtime, you can launch your parachain locally to test the new functionality using the Polkadot Omni Node. For instructions on setting up the Polkadot Omni Node and Polkadot Chain Spec Builder, refer to the Set Up a Parachain Template guide.
Generate a Chain Specification
Create a new chain specification file with the updated runtime by running the following command from your project's root directory using the chain-spec-builder tool:
chain-spec-builder create -t development \
--relay-chain paseo \
--para-id 1000 \
--runtime ./target/release/wbuild/parachain-template-runtime/parachain_template_runtime.compact.compressed.wasm \
named-preset development
This command generates a chain specification file, chain_spec.json, for your parachain with the updated runtime.
Start the Parachain Node
Launch the parachain using the Polkadot Omni Node with the generated chain specification by running the following command:
Verify the node starts successfully and begins producing blocks.
Interact with the Pallet
Use the Polkadot.js Apps interface to verify you can interact with the new pallet.
To interact with the pallet:
- Navigate to Polkadot.js Apps.
- Ensure you're connected to your local node at
ws://127.0.0.1:9944. - Go to the Developer > Extrinsics tab.
- In the submit the following extrinsic section, locate utility in the pallet dropdown.
-
Verify you can see the available extrinsics, such as:
batch(calls): Dispatch multiple calls in a single transaction.batchAll(calls): Dispatch multiple calls, stopping on the first error.asDerivative(index, call): Dispatch a call as a derivative account.
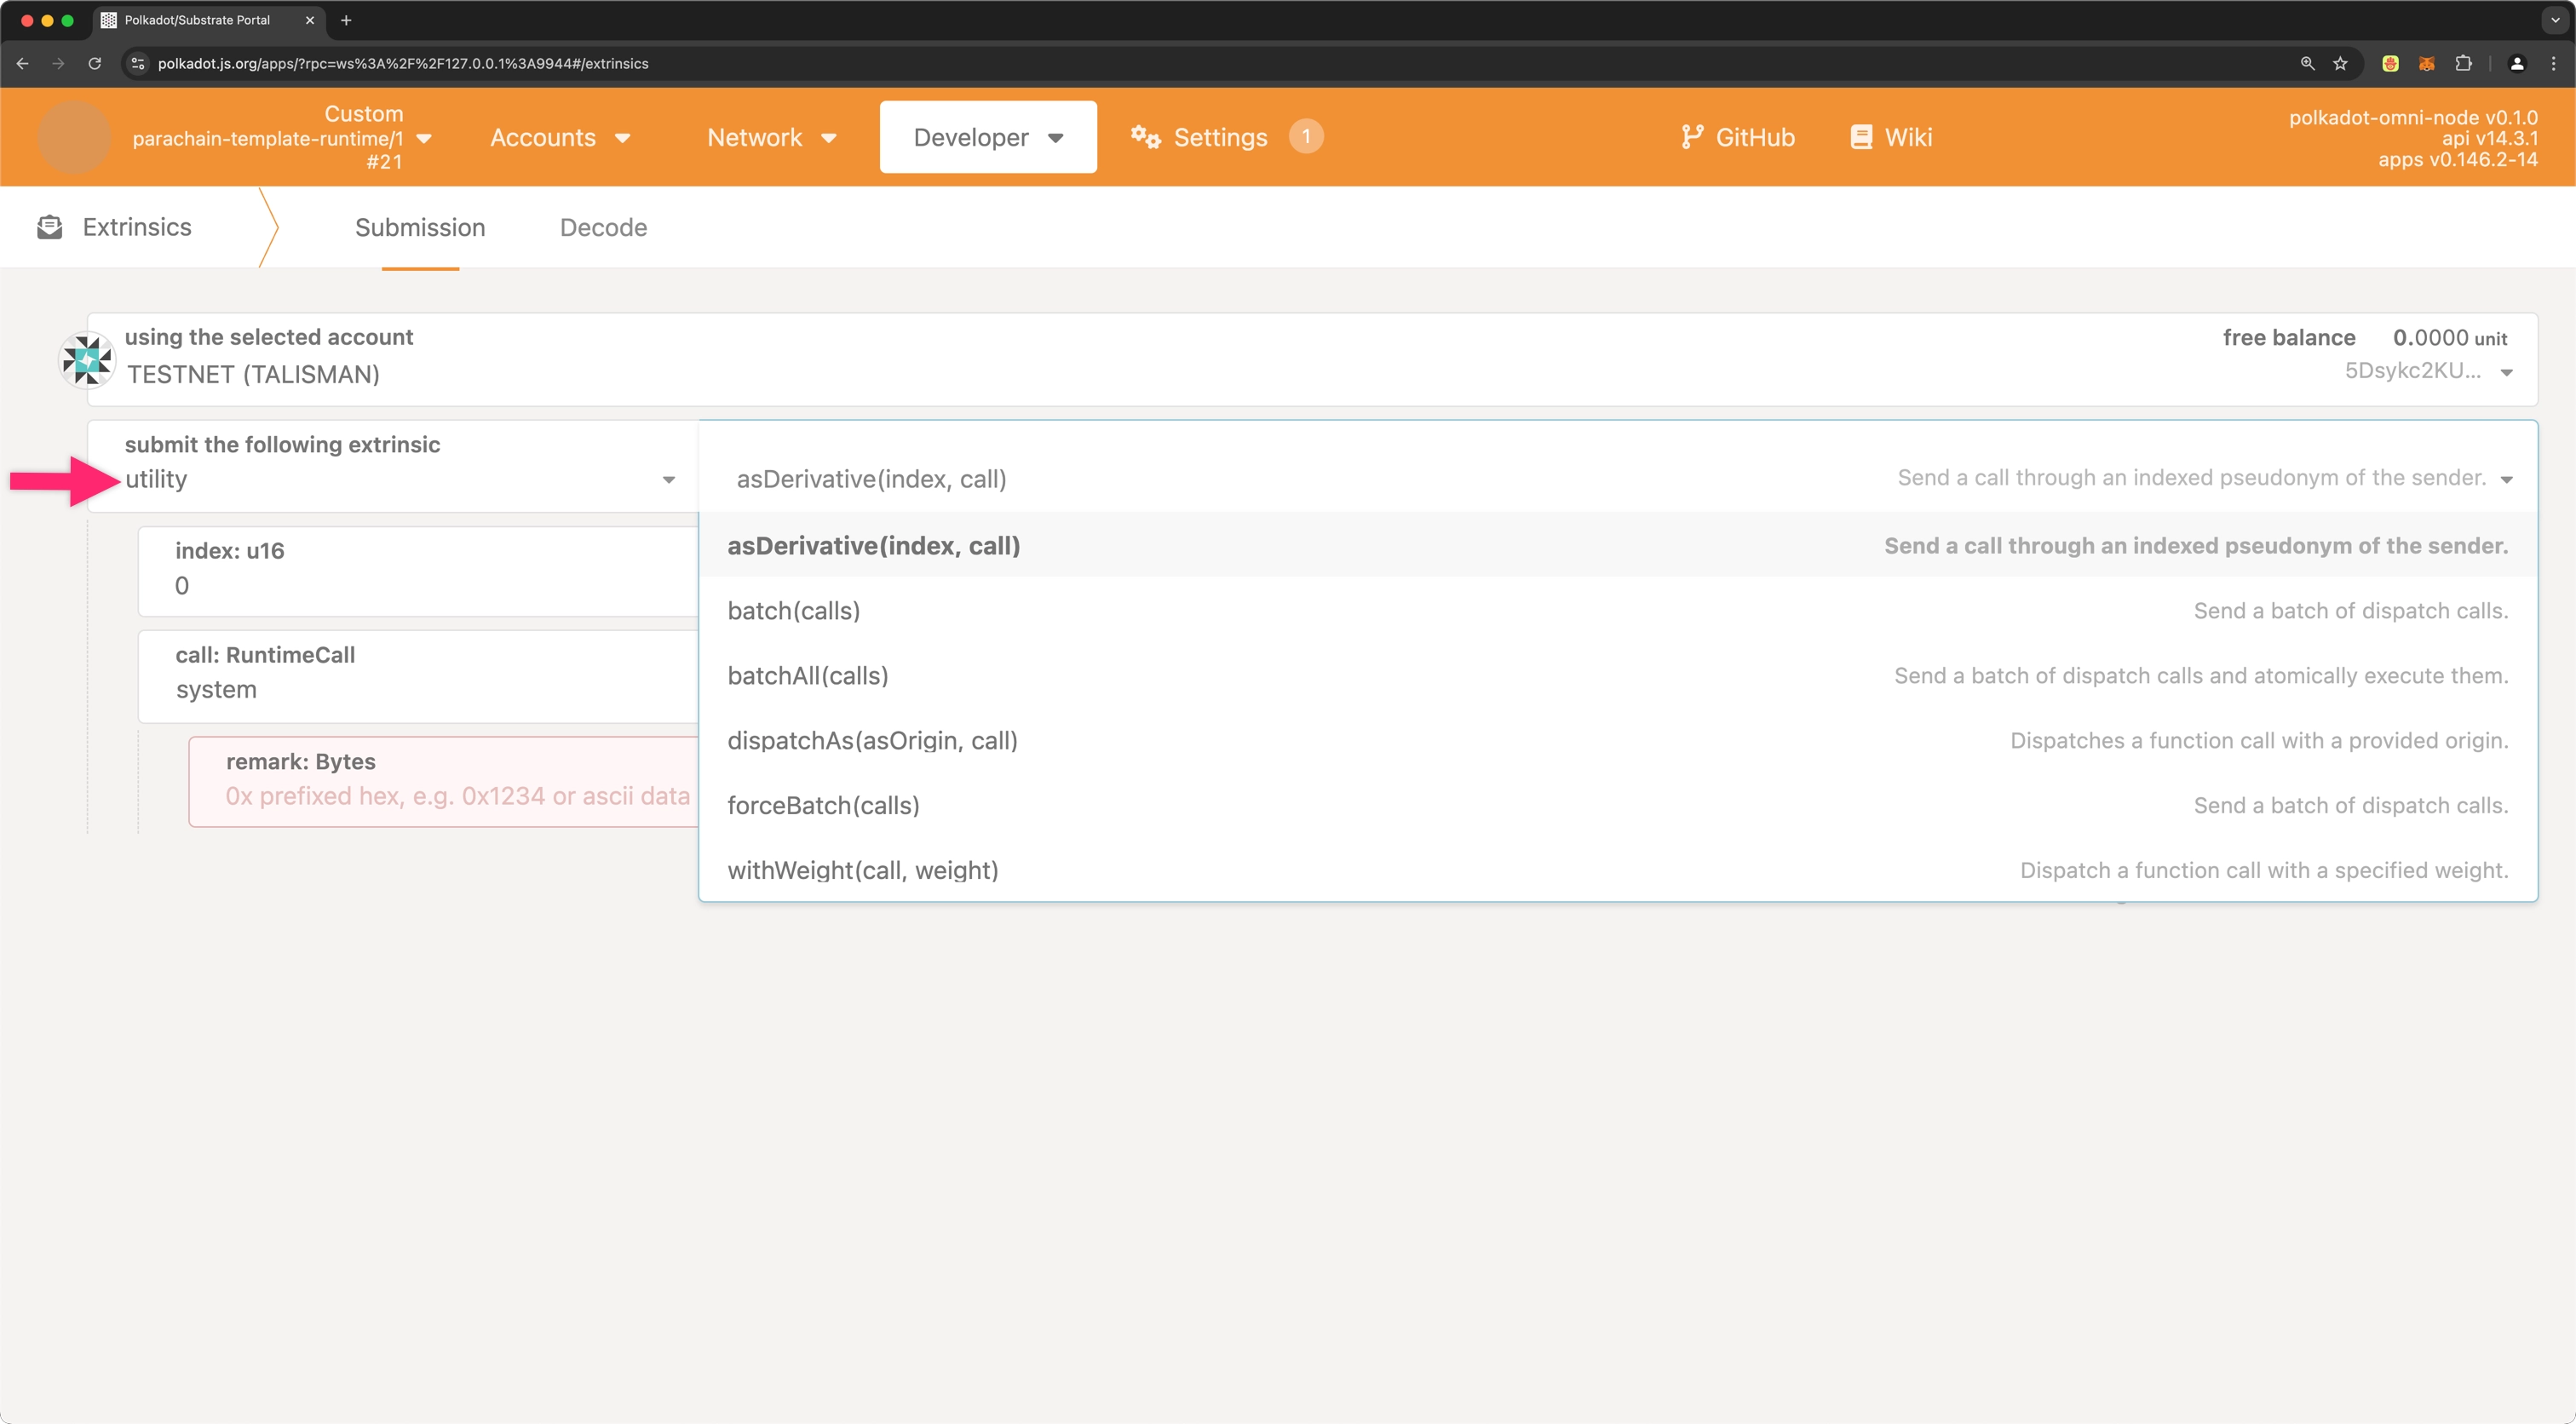
You can now test the pallet's functionality by submitting transactions through the interface.
Where to Go Next
-
Guide Add Multiple Pallet Instances
Learn how to implement multiple instances of the same pallet in your Polkadot SDK-based runtime.
-
Guide Make a Custom Pallet
Learn how to create custom pallets using FRAME.
| Created: October 18, 2024