Obtain Coretime
AdvancedIntroduction
After deploying a parachain to Paseo in the Deploy on Polkadot tutorial, the next critical step is obtaining coretime. Coretime is the mechanism through which validation resources are allocated from the relay chain to your parachain. Your parachain can only produce and finalize blocks on the relay chain by obtaining coretime.
There are two primary ways to obtain coretime:
- On-demand coretime: Purchase coretime on a block-by-block basis, ideal for variable or unpredictable workloads.
- Bulk coretime: Obtain a core or portion of a core for an extended period (up to 28 days), requiring renewal upon lease expiration.
In this tutorial, you will:
- Understand the different coretime options available.
- Learn how to purchase a core via bulk coretime.
- Assign your parachain to a core for block production.
- Explore on-demand coretime as an alternative approach.
Prerequisites
Before proceeding, ensure you have the following:
- A parachain ID reserved on Paseo.
- A properly configured chain specification file (both plain and raw versions).
- A registered parathread with the correct genesis state and runtime.
- A synced collator node running and connected to the Paseo relay chain.
- PAS tokens in your account on the Coretime Chain for transaction fees.
If you haven't completed these prerequisites, start by referring to the Deploy on Polkadot tutorial.
Order On-Demand Coretime
On-demand coretime allows you to purchase validation resources on a per-block basis. This approach is useful when you don't need continuous block production or want to test your parachain before committing to bulk coretime.
On-Demand Extrinsics
There are two extrinsics available for ordering on-demand coretime:
onDemand.placeOrderAllowDeath: Will reap the account once the provided funds are depleted.onDemand.placeOrderKeepAlive: Includes a check to prevent reaping the account, ensuring it remains alive even if funds run out.
Place an On-Demand Order
To place an on-demand coretime order, follow these steps:
-
Open the Polkadot.js Apps interface connected to the Polkadot TestNet (Paseo).
-
Navigate to Developer > Extrinsics in the top menu.
-
Select the account that registered your parachain ID.
-
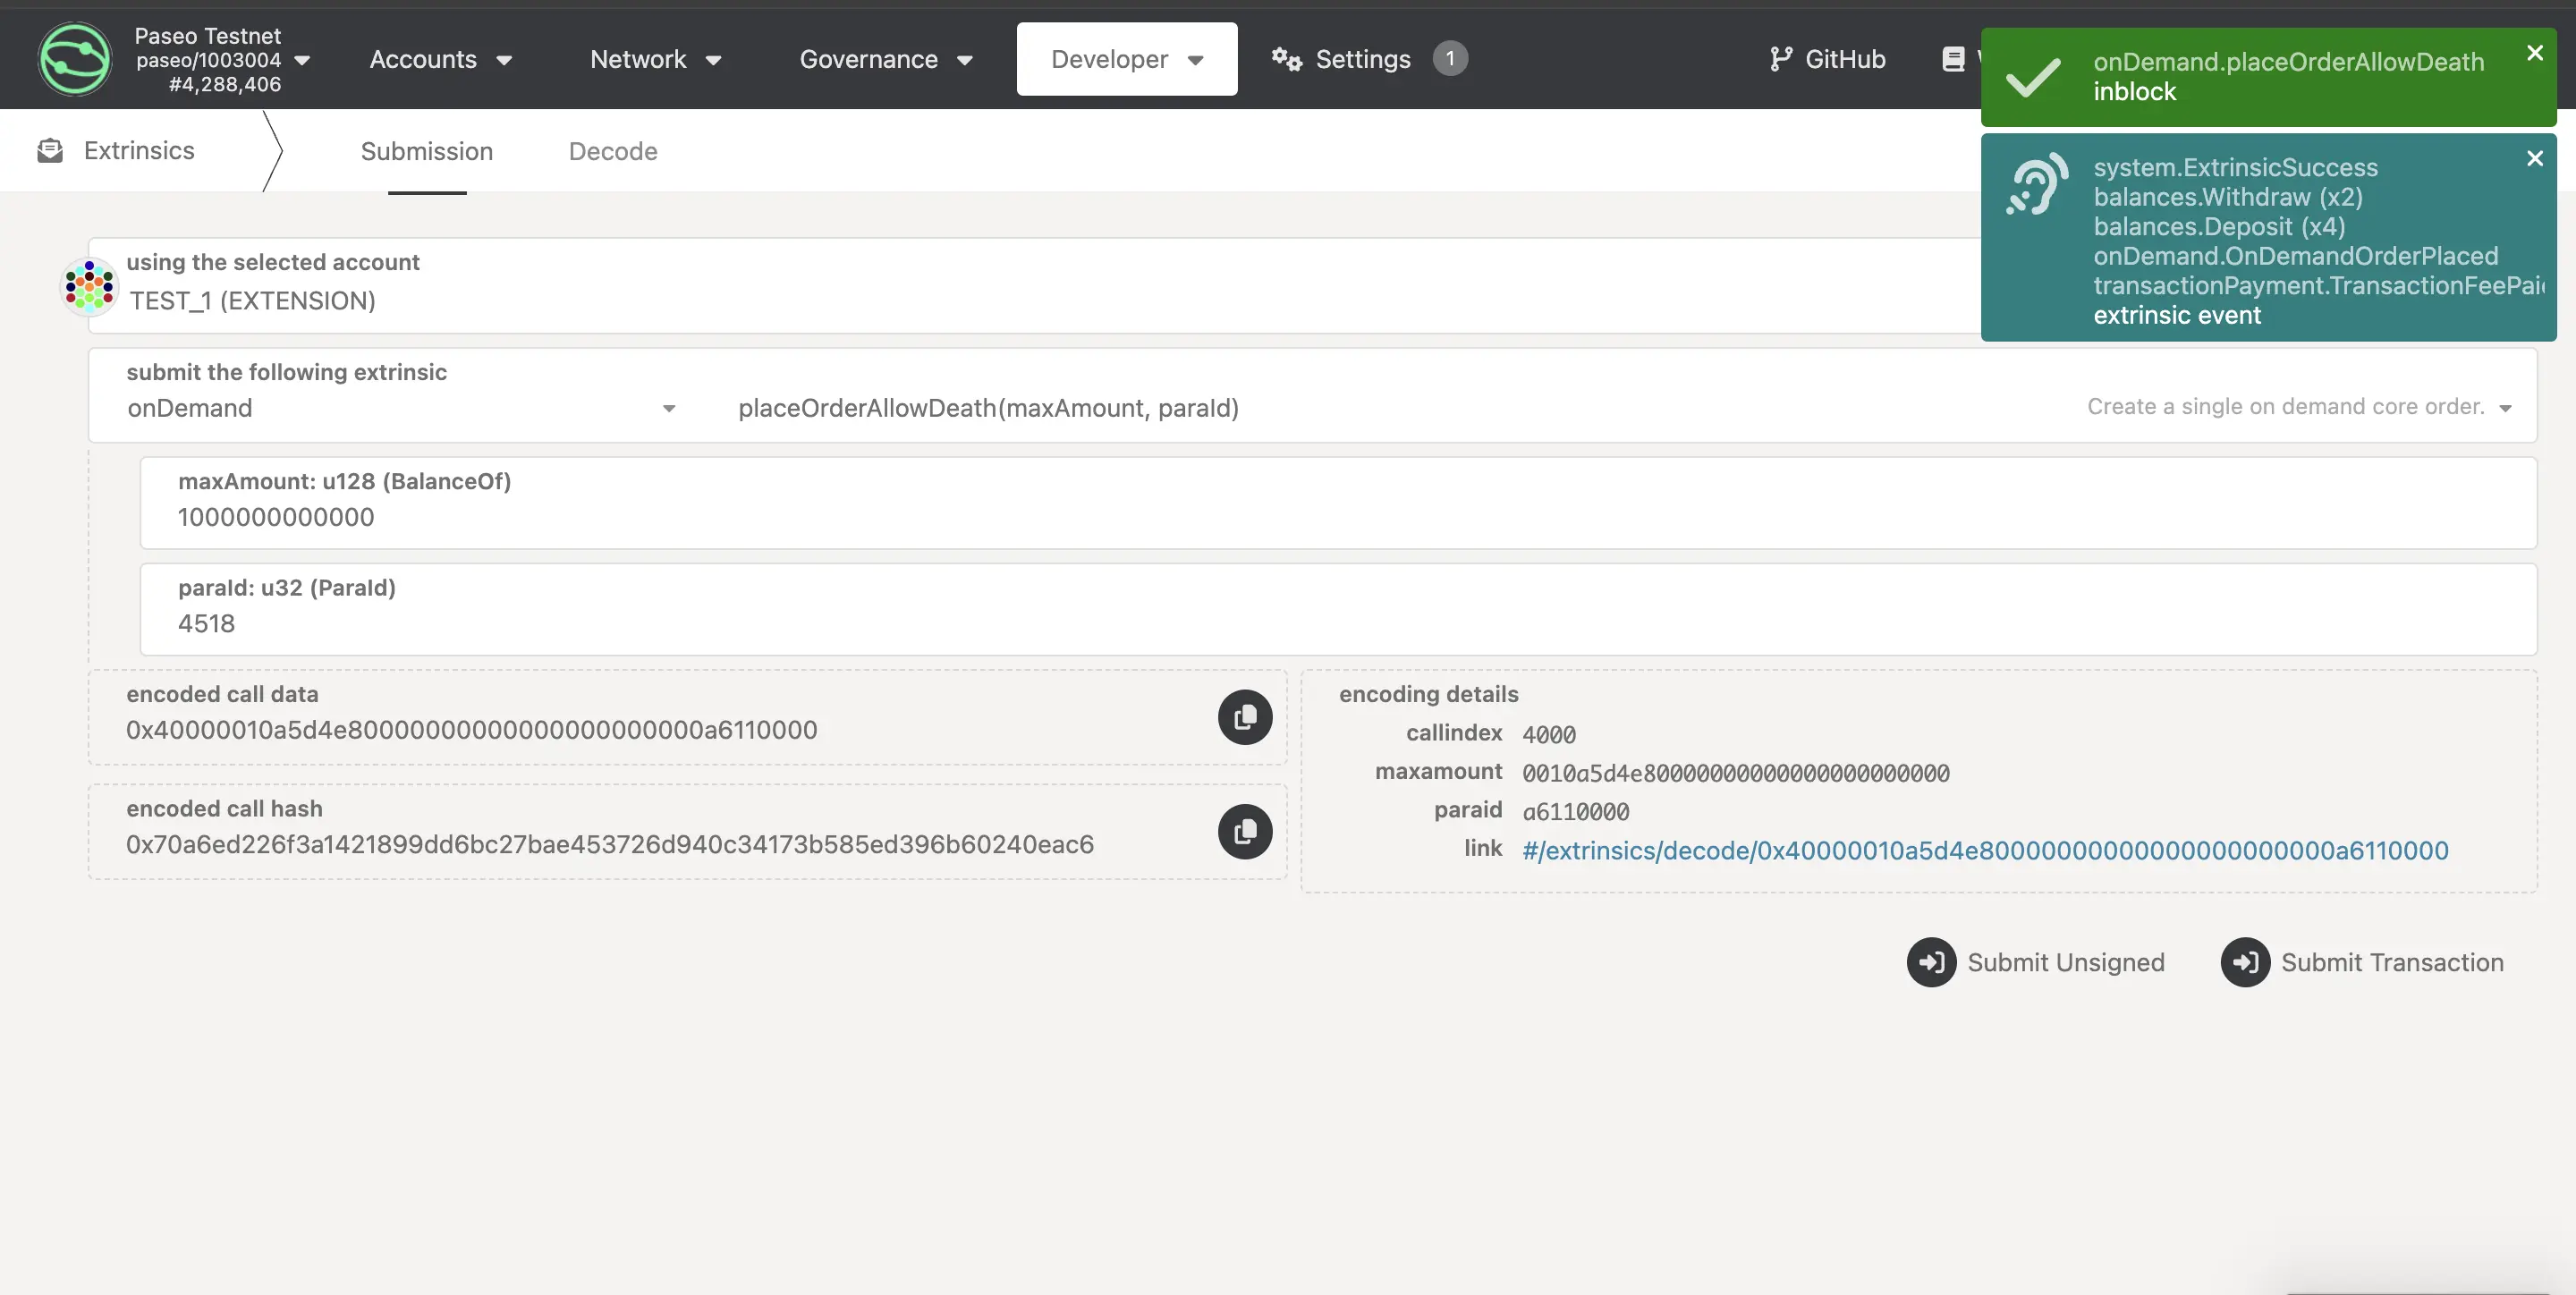
From the submit the following extrinsic dropdown, select onDemand and then choose placeOrderAllowDeath as the extrinsic.
-
Configure the parameters:
- maxAmount: The maximum amount of tokens you're willing to spend (e.g.,
1000000000000). This value may vary depending on network conditions. - paraId: Your reserved parachain ID (e.g.,
4508).
- maxAmount: The maximum amount of tokens you're willing to spend (e.g.,
-
Review the transaction details and click Submit Transaction.
Upon successful submission, your parachain will produce a new block. You can verify this by checking your collator node logs, which should display output confirming block production.
Note
Each successful on-demand extrinsic will trigger one block production cycle. For continuous block production, you'll need to place multiple orders or consider bulk coretime.
Purchase Bulk Coretime
Bulk coretime offers a cost-effective way to maintain continuous block production. It lets you reserve a core for up to 28 days and renew it as needed.
You can purchase and manage cores on the Coretime Chain, a system parachain that runs the pallet_broker to handle core sales, allocation, and renewal across the Polkadot ecosystem.
Tip
Paseo has a unique process for obtaining coretime cores. Refer to the PAS-10 Onboard Paras Coretime guide for detailed instructions.
This tutorial shows you how to purchase bulk coretime using the RegionX Coretime Marketplace, a user-friendly interface for buying and managing cores on both the Polkadot TestNet and production networks.
Connect Your Wallet to RegionX
-
Visit the RegionX App.
-
Click the Connect Wallet button in the upper right corner.
-
Select your wallet provider and approve the connection.
Obtain Coretime Chain Funds
To purchase a core, you need funds on the Coretime Chain. You can fund your account directly on the Coretime Chain using the Polkadot Faucet:
-
Visit the Polkadot Faucet.
-
Select the Coretime (Paseo) network from the dropdown menu.
-
Paste your wallet address in the input field.
-
Click Get some PASs to receive 5000 PAS tokens.
Note
The Polkadot Faucet has a daily limit of 5,000 PAS tokens per account. If you need more tokens than this limit allows, you have two options:
- Return to the faucet on consecutive days to accumulate additional tokens.
- Create additional accounts, fund each one separately, and then transfer the tokens to your primary account that will be making the bulk coretime purchase.
Alternatively, to expedite the process, you can send a message to the Paseo Support channel on Matrix, and the Paseo team will assist you in funding your account.
Purchase a Core
-
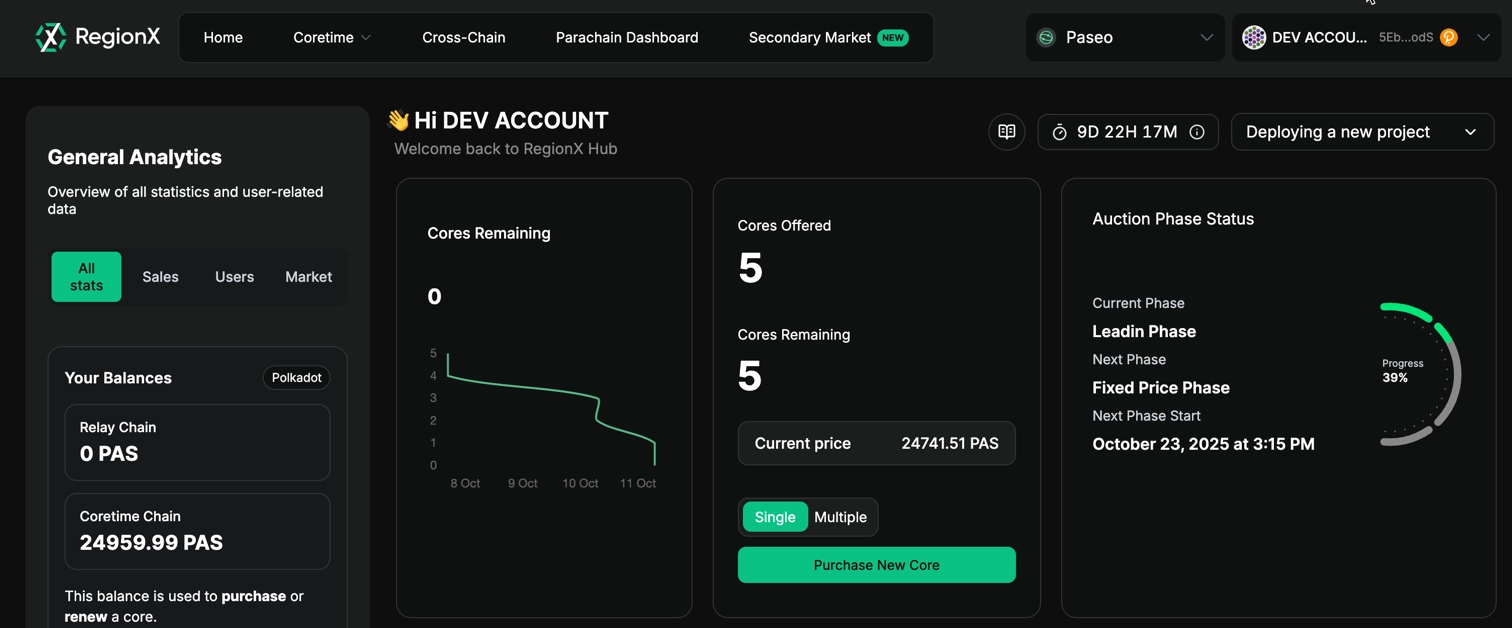
From the RegionX home page, ensure the correct network is selected using the network switch in the top right corner (set to Paseo).
-
Review the information displayed on the home page, including:
- Cores Remaining: Number of available cores
- Cores Offered: Total cores in the current sale
- Current price: The price per core in PAS tokens
- Auction Phase Status: Current phase and progress
-
Click the Purchase New Core button displayed on the page.
-
A modal will appear detailing the transaction details and fees. Review the information carefully.
-
Click Ok and sign the transaction using your connected wallet.
-
Wait for the transaction to be confirmed on-chain.
Verify Your Purchase
-
Once the transaction is confirmed, navigate to My Regions from the left menu.
-
You should see your newly purchased core listed in your dashboard.
Congratulations! You've successfully purchased a core using RegionX.
Assign Your Parachain to the Core
With your core purchased, you now need to assign your parachain to it for block production:
-
From the My Regions page, click on your core to select it.
-
Click the Assign option from the left-hand menu.
-
A modal will appear, allowing you to add a new task.
-
Click Add Task and enter the following information:
- Parachain ID: Your reserved parachain identifier
- Project Name: The name of your parachain project
-
Click Add Task to proceed.
-
Select your parachain task from the list.
-
Set the core's Finality setting:
- Provisional: Allows interlacing and partitioning of the core, but the region cannot be renewed as-is.
- Final: Prevents modification of the core but allows renewal. Choose this if you plan to renew the core.
-
Sign and submit the transaction.
Once confirmed, your parachain will be assigned to the core and should begin producing blocks (provided your collator is running and synced with the relay chain).
Next Steps
Your parachain is now set up for block production. Consider the following:
- Monitor your collator: Keep your collator node running and monitor its performance.
- Plan coretime renewal: If using bulk coretime, plan to renew your core before the current lease expires.
- Explore runtime upgrades: Once comfortable with your setup, explore how to upgrade your parachain's runtime without interrupting block production.
| Created: October 18, 2024